
Good Monday Morning everyone! I hope you had a wonderful start into the new week.
I got several requests about using the photo masks in Photoshop and made a little, quick tutorial on how to get the photo masks to work 🙂 Screens are with PS CS5
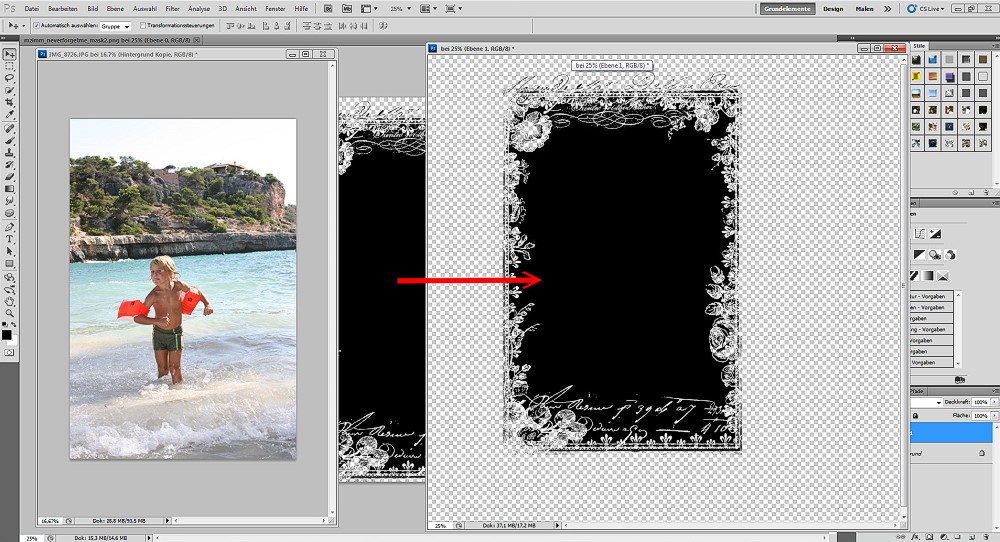
First open a new blank document and open the photo mask you wish to use.
With the move tool drag and drop the photo mask onto your new document.
I already had the photo I want to use open, you can ignore it at this point 🙂
************
Guten (Montag) Morgen!
Ich hatte bereits einige Anfragen, wie man denn die Fotomasken in Photoshop anwendet. Bisher habe ich dann immer schnell per E-Mail geantwortet und das “Problem” war gelöst. Aber nun habe ich mal ein kleines, schnelles Tutorial geschrieben:
Zuerst öffne ein neues Bild und öffne die Fotomaske (Clipping Mask), welche du verwenden möchtest!
Mit dem Verschieben Werkzeug ziehe die Maske und lege sie im neuen Bild ab!
Ich habe hier auf dem Screen bereits mein Foto mitgeöffnet, das kann jetzt hier erst Mal ignoriert werden 🙂
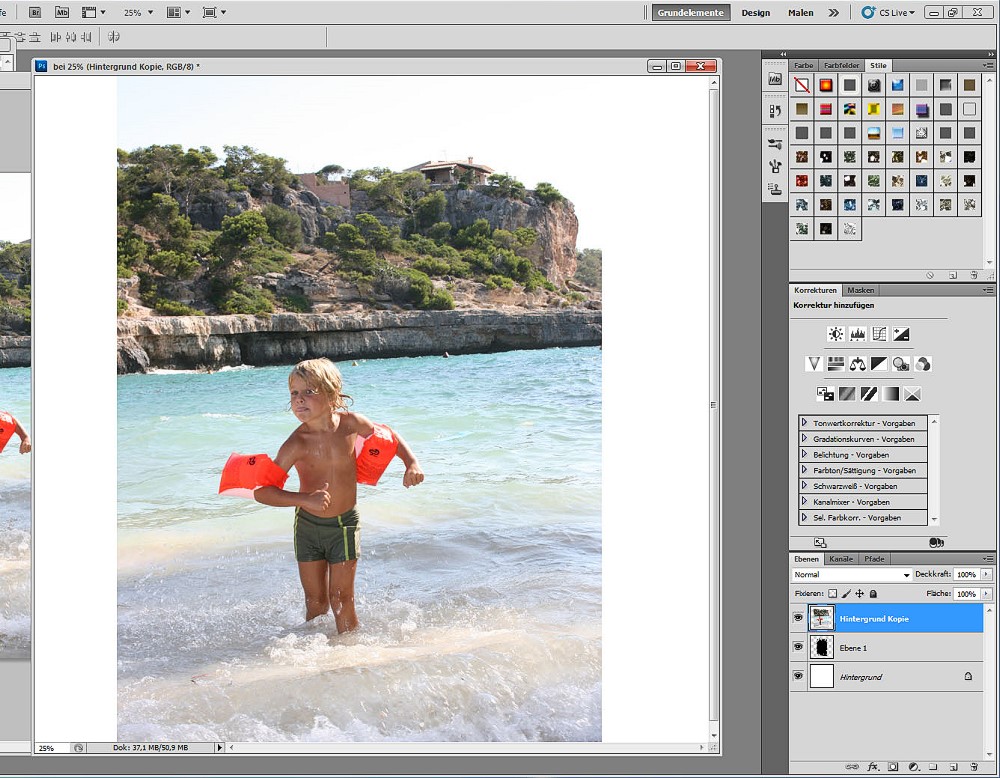
Now open your photo and drag and drop it using the move tool on top of the photo mask.
***************
Nun öffne dein Foto und ziehe es ebenso in das neue Bild und lege es über der Maske ab!
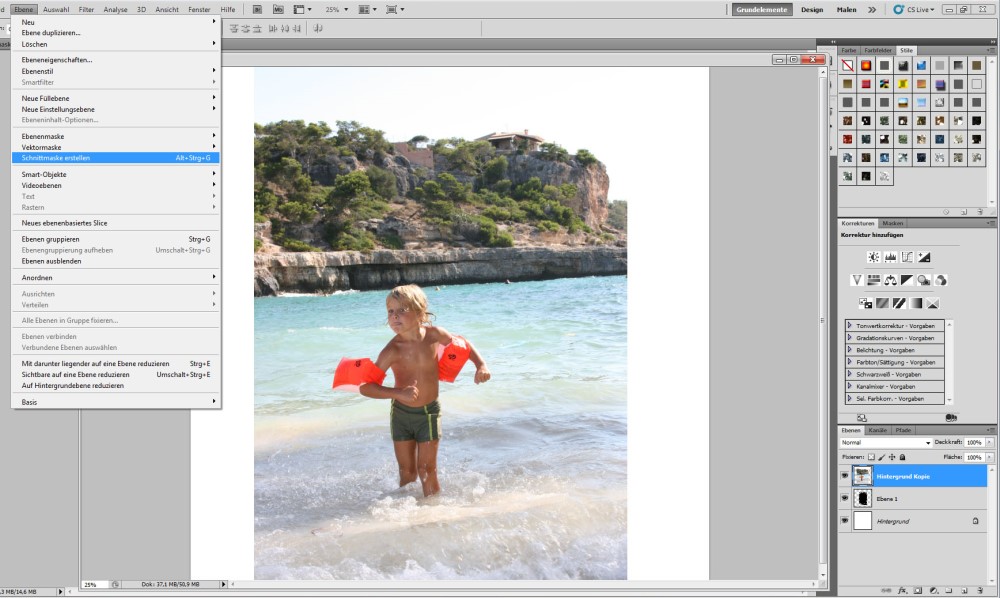
Now go to Layer (in my screenshots it is german language, but you can see where I am with my cursor) –> Create Clipping Mask! Or you can also right click on the layer you put on top of the clipping mask and select from there Create Clipping Mask!
**************
Nun gehe zu –> Ebene und wähle aus: Schnittmaske erstellen. Kann man auch direkt im Ebenemanager machen. Rechtsklick auf die Ebene (dein Foto) über der Maske und im Menü dann Schnittmaske erstellen auswählen.
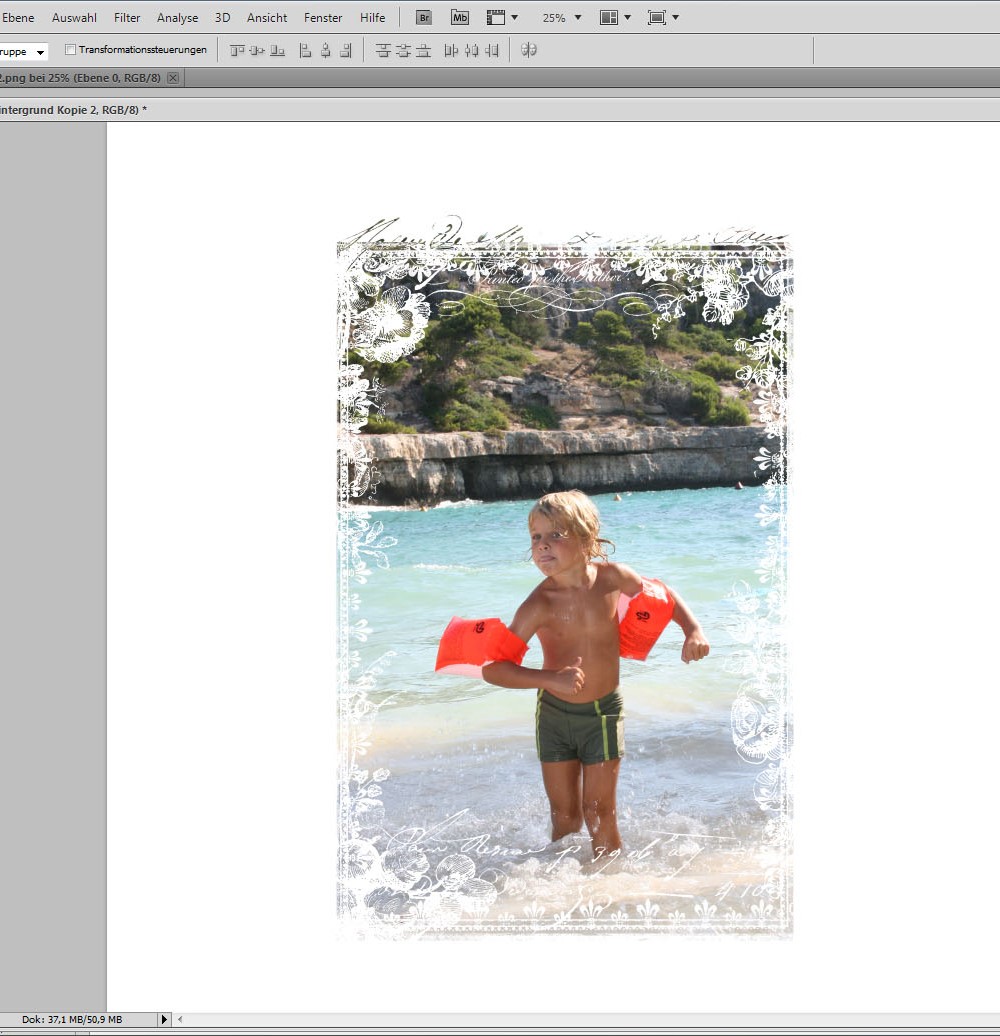
After you have done so it should look like that and you clipped your photo onto the photo mask. With the move tool you can now move your photo into the correct position till you are satisfied!
************
Nun sollte das Ganze schon so aussehen und du hast dein Foto auf die Maske gekappt (clipped). Mit dem Verschieben Werkzeug kannst du nun dein Foto noch in die richtige Position bringen bis du mit dem Ergebnis zufrieden bist.
Boy that was simple…thank you so much will be working on a layout and will post it on your facebook page. Thank you so much.
So easy once you know!! Thanks, dear!